
As an Amazon Associate, I earn from qualifying purchases.
In this article 4 sections
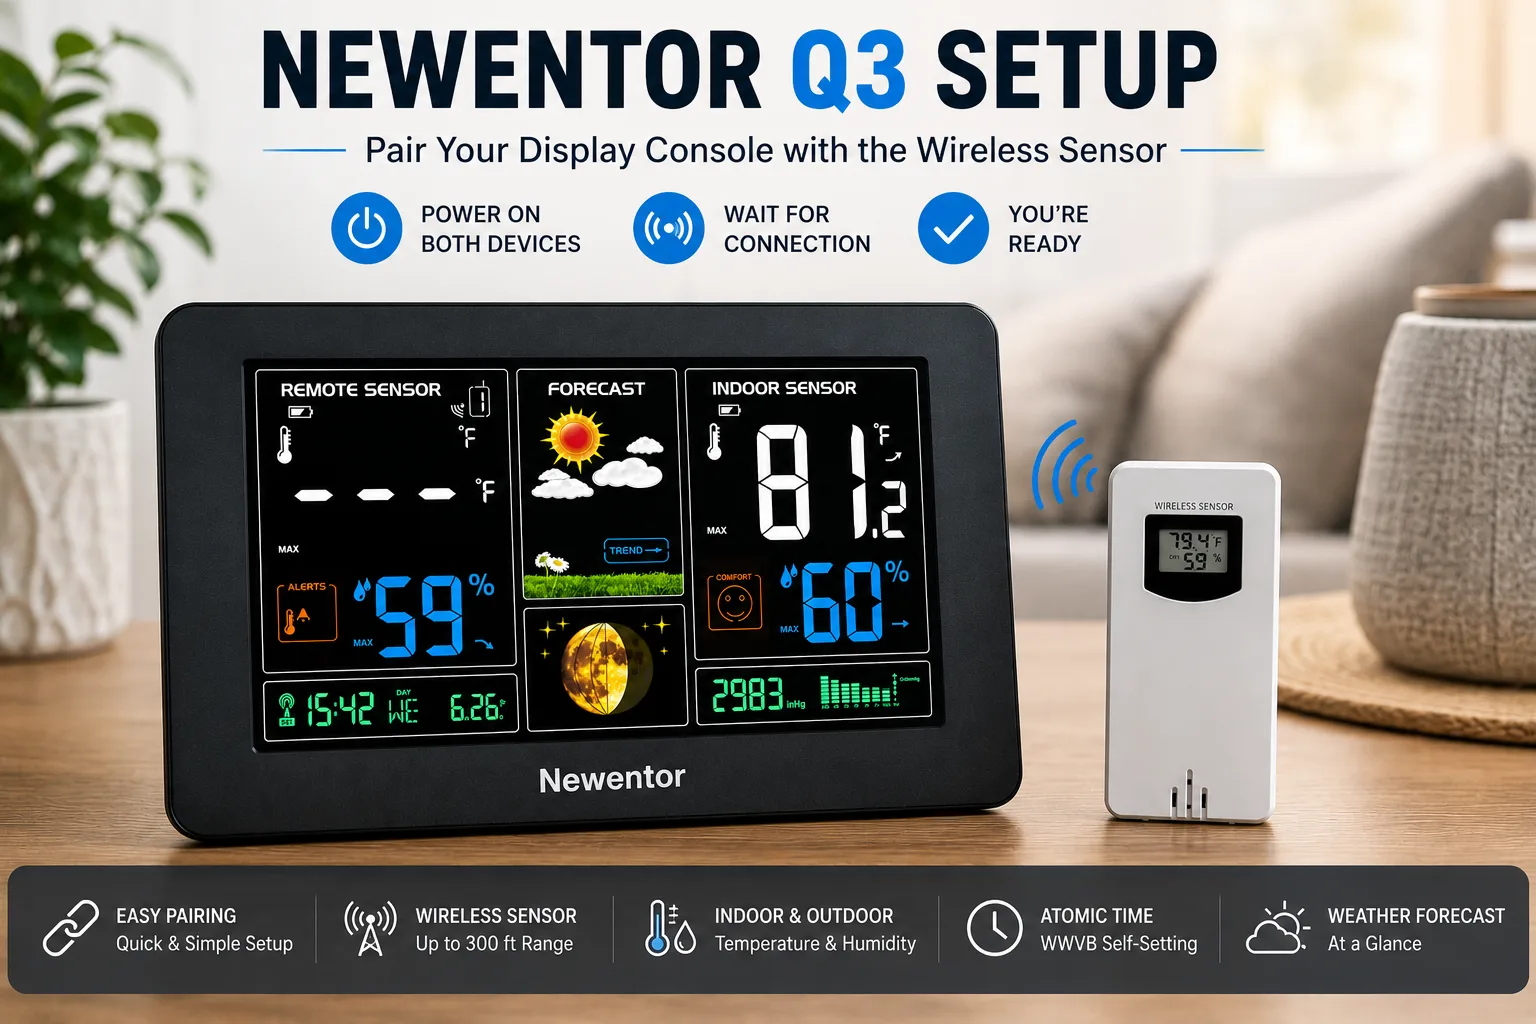
Newentor Q3 setup takes around 10 minutes: the most important steps are powering the sensor before the display and confirming both are on the same channel.
The Newentor Q3 is generally straightforward to set up: no Wi-Fi, no app, no account. The display finds the outdoor sensor automatically once both are powered. The steps that catch owners off guard are the channel setting (critical if pairing fails), the WWVB atomic time (takes up to 24 hours on first setup), and the barometric calibration period (takes several days before forecast icons are reliable).
This page covers the complete setup walkthrough from unboxing to first outdoor reading. If the sensor loses connection after setup, see the Newentor Q3 not connecting fixes page. For the full review and specifications see the Newentor Q3 review.
What You Need Before Starting
Included in box with AC adapter
Included, check channel switch before installing batteries
For outdoor sensor, not included. Use fresh name-brand alkaline for initial setup
Included, required for constant backlight. Battery-only operation dims screen after ~15 seconds
North-facing wall or permanently shaded surface: confirm before mounting
Complete Setup Walkthrough
- Open the battery compartment on the outdoor sensor
- Locate the channel switch: a button or slider marked 1, 2, 3. Leave it on Channel 1 for initial setup unless you already have another Newentor sensor on Channel 1 nearby
- Install two fresh AA alkaline batteries per the polarity diagram
- The sensor LED should flash approximately every 60 seconds: confirming it is transmitting
- Replace the battery cover: do not mount the sensor outdoors yet
- Place the display console on a flat surface near a wall outlet
- Plug the included AC adapter into the display and into the wall outlet
- The display will illuminate and begin searching for the outdoor sensor automatically
With both units powered, place them 5 to 10 feet apart indoors with nothing between them.
- The display will automatically search for the outdoor sensor for several minutes after power is restored
- Do not press any buttons during this window: interrupting the search can prevent automatic pairing
- The outdoor temperature and humidity readings will appear once pairing is complete
If the outdoor reading does not appear after a few minutes:
- Press and hold the DOWN button on the display to start a manual search
- Press the TX button on the outdoor sensor (inside the battery compartment)
- Wait 2 to 3 minutes for the outdoor reading to appear
The Newentor Q3 receives the WWVB atomic time signal broadcast from Fort Collins, Colorado. Per Newentor's official documentation, the station searches for the WWVB signal daily at 1:00 AM, or immediately after a reset.
- Press and hold the first button on the display to enter time configuration
- Use UP and DOWN buttons to select the display format (12hr/24hr), then press the first button to confirm and advance to time zone
- Select your time zone: PST (-8), MST (-7), CST (-6), or EST (-5)
- Set DST to Auto for automatic daylight saving time adjustment
- Press the first button again to save and exit settings
- Allow up to 24 hours for the WWVB signal to be acquired and the time to set automatically
- Place the display away from computers, televisions, routers, and large metal objects
- The signal is strongest overnight: allow a full night for first acquisition
- If you are outside the continental US, the WWVB signal may not be available: set the time manually
- Per Newentor's documentation: configure the correct time zone and DST settings before initiating a manual WWVB search: automatic synchronisation may not work correctly until these are set
Dual alarms
The Q3 has two independent alarms with snooze. Use the SET button to access alarm configuration: refer to your included quick-start card for the exact button sequence. To disable an alarm entirely, enter alarm settings and toggle it off. If an alarm sounds and you want to silence it: press SNOOZE to delay for 10 minutes, or press the alarm button to dismiss it completely.
Temperature and humidity alerts
The Q3 supports customisable high and low alerts for indoor and outdoor temperature and humidity. Use the SET or alert button to configure thresholds:
- Outdoor temp low alert: set this for frost warning. The frost alert feature accounts for both temperature and humidity conditions: refer to the Newentor Q3 manual for the specific calculation details
- Outdoor temp high alert: useful for summer heat monitoring
- Indoor humidity alerts: helpful for comfort monitoring in winter heating or summer AC conditions
Sensor placement is the single most important factor for accurate temperature readings. The outdoor sensor must be shaded from direct sunlight at all times of day, even with the built-in radiation shield, direct sun can increase measured temperatures by several degrees.
- North-facing exterior wall
- Under an eave or overhang
- Permanently shaded by structure or tree
- Vertical orientation
- Away from dryer vents and AC units
- Within wireless range of display
- Direct sunlight at any time of day
- South or west-facing walls
- Near dark heat-absorbing surfaces
- Locations prone to water pooling
- Near AC exhausts or dryer vents
- Against walls with internal heat sources
- Confirm the sensor is still reading on the display before mounting
- Mount vertically using the included bracket or appropriate outdoor screws
- Carry the display to the proposed mounting location to confirm wireless range before finalising
- After mounting, check the display from indoors to confirm outdoor readings are still updating
5 Common Setup Mistakes to Avoid
The display opens its search window when it first powers on. If the sensor is not yet transmitting, the window closes and manual pairing is needed. For initial setup or re-pairing, install the sensor batteries before powering the display.
The sensor and display must be on the same channel (1, 2, or 3). A mismatch means the display cannot find the sensor regardless of distance. Check the channel button in the sensor battery compartment.
Direct sunlight on the sensor housing inflates temperature readings by several degrees. A north-facing or permanently shaded location is essential for accurate readings.
The forecast icons may require several days to adapt to local pressure patterns before becoming reliable. Judging them in the first 24 hours will likely give a poor impression of the feature.
The station searches for the atomic time signal at 1:00 AM. Allow a full night after setup before the time self-sets. Set the time zone and DST correctly first or the signal cannot be used.
Frequently Asked Questions
How do I pair the Newentor Q3 outdoor sensor?
Install fresh AA alkaline batteries in the outdoor sensor first with the channel switch on Channel 1. Then plug in the AC adapter on the display: it searches automatically. If the outdoor reading does not appear after a few minutes, press and hold the DOWN button on the display to start a manual search, then press the TX button on the sensor and wait 2 to 3 minutes.
How do I set the time on the Newentor Q3?
Press and hold the first button on the display to enter time zone settings. Use UP and DOWN to select PST, MST, CST, or EST. Enable DST (Auto recommended). The Q3 searches for the WWVB atomic signal daily at 1:00 AM: allow up to 24 hours after initial setup for the time to set automatically. The time can also be set manually if WWVB is unavailable in your area.
How do I stop the Newentor Q3 screen from turning off?
The screen dims after approximately 15 seconds on battery power only. Plug in the included AC adapter to keep the screen permanently lit with adjustable brightness. The AC adapter is included in the box: this is the intended operating mode for most home placements.
How do I turn off the alarm on the Newentor Q3?
Press SNOOZE to delay the alarm for 10 minutes, or press the alarm button to dismiss it. To disable an alarm permanently, enter alarm settings via the SET button and toggle it off. The Q3 has two independent alarms: confirm both are disabled if you want no alarm to sound.
Related Newentor pages
Research Note
This station has not been personally tested by this site: our analysis is based on manufacturer documentation. Our tip: if the outdoor sensor does not appear, confirm the channel match and run the manual DOWN + TX pairing. The WWVB time can take a full night to set, and the forecast needs its calibration period.

Lena Thornton
Weather Station Analyst & CWOP Contributor. Lena researched, reviewed and analysed Newentor Q3 setup procedures using official Newentor documentation, Amazon Q&A responses. Updated July 2026.