
In this article 9 sections
- Step-by-Step Setup: La Crosse S77925
- 5 Common S77925 Setup Mistakes: and How to Avoid Them
- Sensor Placement: Where to Mount and Where to Avoid
- Video: S77925 Setup Walkthrough
- Installing Add-On Sensors (TX145R Rain Sensor or Extra Temperature Sensors)
- Pressure Calibration and Forecast Accuracy
- Setup Complete? Run Through This Checklist
- If Setup Does Not Work: Quick Fixes
- Frequently Asked Questions
La Crosse S77925 Setup: Step-by-Step From Unboxing to First Reading
Product covered in this analysis
La Crosse S77925 Setup
See today’s price, delivery options and customer reviews on Amazon.
As an Amazon Associate, I earn from qualifying purchases.
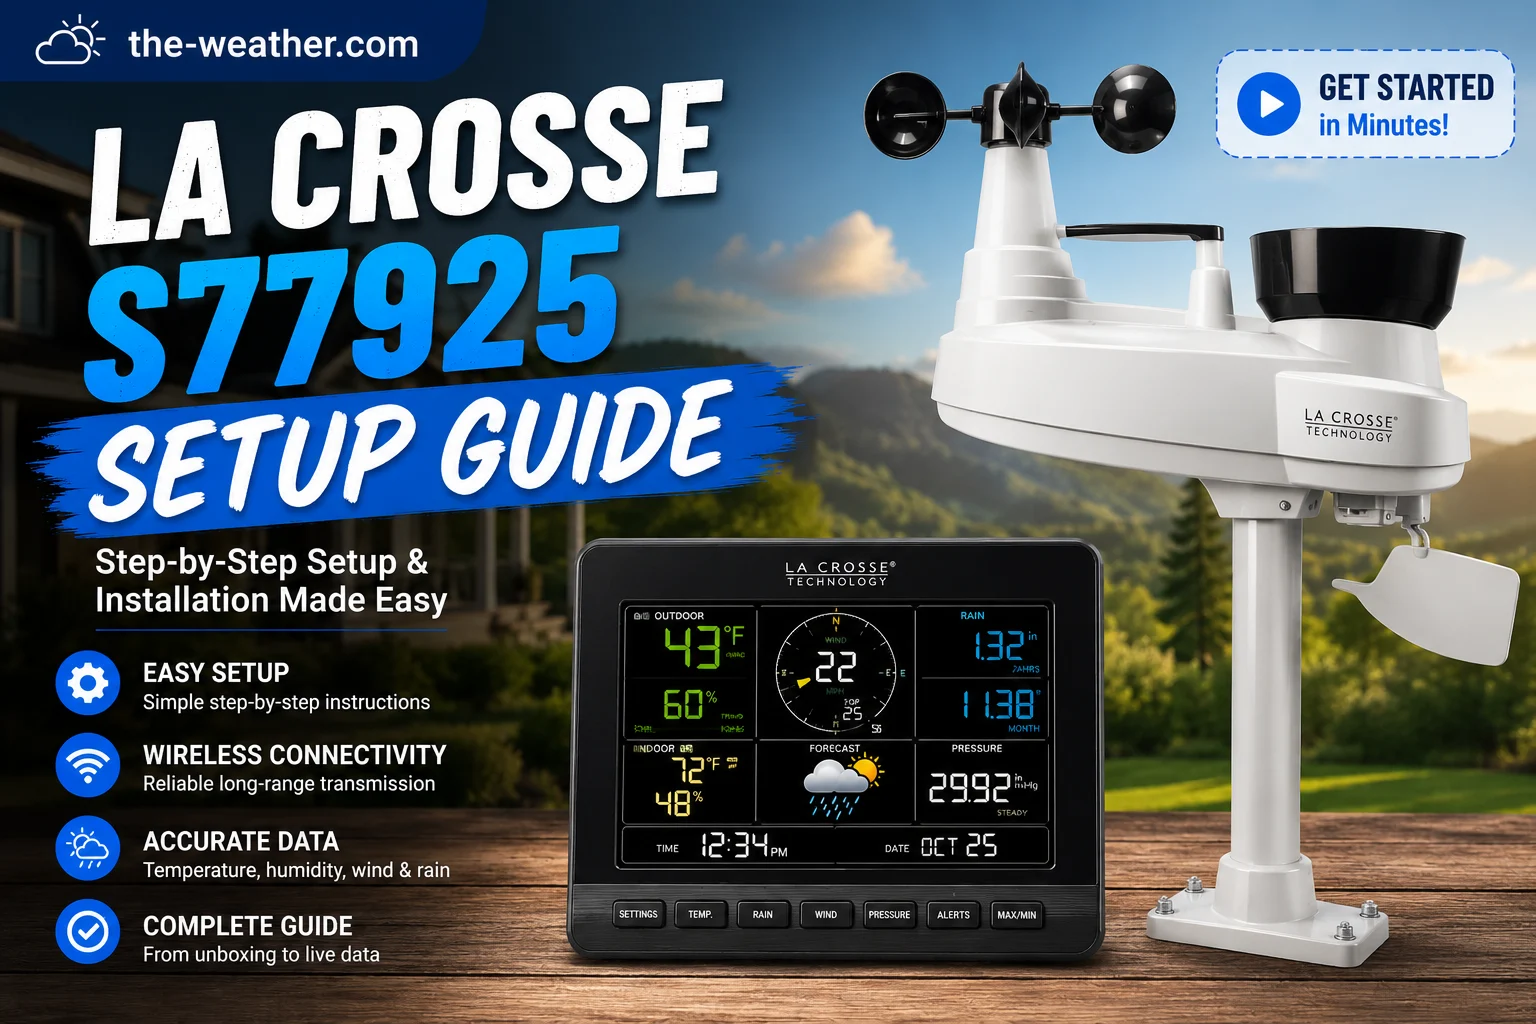
S77925 console with the TX141TH-BV3 outdoor sensor. Pair them indoors first before mounting the sensor outside.
What's in the box
- La Crosse S77925 display console
- TX141TH-BV3 outdoor wireless sensor
- 5V AC power adapter (for console)
- Mounting hardware for sensor
- Batteries NOT included: you need 2 AA alkaline for the sensor, optionally 3 AA for console backup
How long does each step take?
Step-by-Step Setup: La Crosse S77925
All steps verified from the official S77925v2 manual on ManualsLib and the La Crosse S77925v3 official product page.
-
1Install batteries in the outdoor sensor first
Open the battery compartment on the TX141TH-BV3 outdoor sensor. Install 2 fresh AA alkaline batteries according to polarity markings. The sensor LED will flash once to confirm it is transmitting.
⚠️ Do not place the sensor outside yet. Keep it indoors next to the display for pairing: within 3 to 5 feet is ideal. Moving it outside before pairing is the most common setup mistake.💡 La Crosse specifies fresh alkaline batteries. Do not use rechargeable NiMH batteries: they operate at a lower voltage and cause intermittent connection or no pairing at all. -
2Power up the display console
- Insert the included 5V power adapter into a working outlet
- Connect the power jack to the port on the back of the S77925 console
- Optional but recommended: install 3 AA alkaline batteries in the console's backup battery compartment: these preserve your settings memory during power outages. Note: the display backlight goes dark when AC power is disconnected regardless of backup batteries: backup power maintains your settings, not the display itself. Always use fresh alkaline batteries for backup.
The display will light up and show the indoor temperature immediately. The outdoor sensor area will show dashes while searching for the TX141TH-BV3.
-
3Wait for sensor pairing: up to 10 minutes
With the sensor powered and within a few feet of the console, the display will find the sensor automatically. The reception indicator animates while searching. Allow up to 10 minutes for the outdoor temperature and humidity readings to appear.
💡 Per the official manual: once outdoor readings appear on the display, pairing is complete. You can now move the sensor to its outdoor mounting location.⚠️ If pairing fails after 10 minutes: hold the+button for 2 seconds to trigger a manual search. If still no connection, remove batteries from both units, press any button on the console 20 times, wait 2 minutes, then reinstall fresh batteries in the sensor first and restore console power. -
4Configure the settings menu
Hold the
SETbutton to enter the settings menu. Use+and−to adjust each value. PressSETto confirm and move to the next setting.Setting Options Recommended Time zone 7 US/Canada zones Your local zone DST Auto / Manual / Off Auto Clock format 12hr / 24hr Your preference Language English / French / Spanish English Temperature unit °F / °C Your preference Pressure unit hPa / inHg / mmHg inHg (US) or hPa (international) High/Low temp alerts Custom threshold Set to your comfort range High/Low humidity alerts Custom threshold 40–60% RH for most homes Backlight / Auto-dim 5 levels + schedule Auto-dim on for bedroom use 💡 Set your high/low humidity alerts now: this is one of the S77925's most practical features for basement, greenhouse, or baby room monitoring. The alert triggers an audible beep when humidity exceeds your set threshold. -
5Sync the atomic clock
The S77925 uses a genuine WWVB radio-controlled atomic clock, broadcast from NIST in Fort Collins, Colorado. It automatically searches for the signal at 7, 8, 9, 10, and 11 AM local time each day.
- Press and release
SETto manually trigger a signal search at any time - Place the console near a window for best reception: WWVB signal is strongest between midnight and 4 AM
- If the clock does not sync within 24 hours, move the console to a window on the north or east side of the building and try the manual search again during nighttime hours
⚠️ WWVB reception is weakest in the western US, in buildings with metal frames or foil insulation, and in basements. If automatic sync fails after 48 hours, set the time manually via the settings menu and rely on the display's manual time setting.💡 The atomic signal tower icon on the display confirms successful sync. If it shows without the signal icon, the time was set manually: the display will continue trying to sync automatically at the scheduled search times. - Press and release
-
6Mount the outdoor sensor
Per La Crosse's official TX141TH-BV3 documentation:
- Height: at least 6 feet off the ground
- Facing: north-facing wall preferred: avoids direct sun exposure during peak heat hours
- Under shelter: 6 to 18 inches under an eave or below a deck rail is ideal
- Orientation: mount vertically so moisture drains out the bottom, never mount the sensor horizontally
- Range: keep within 330 feet of the console in open air; each wall between sensor and display reduces effective range by 30–50 feet
⚠️ Avoid mounting near: south-facing brick or stone walls (absorb and radiate heat), metal roofs, air conditioning units, dryer vents, or any heat-emitting surface. All cause inflated temperature readings.
5 Common S77925 Setup Mistakes: and How to Avoid Them
The display needs to find the sensor before it can maintain a connection at outdoor distances. Install batteries in the sensor, keep it indoors next to the display, wait for the outdoor temperature to appear, then mount it outside. Doing it the other way around is the single most common cause of setup frustration.
NiMH batteries operate at 1.2V. Per the official La Crosse S77925 manual, a minimum of 1.48V per battery is required for best performance. Rechargeable batteries cause intermittent connection, erratic readings, or no pairing at all, even when fully charged. Always use fresh alkaline batteries in the TX141TH-BV3 sensor.
Direct sun on the sensor housing causes radiant heat buildup that reads 10–20°F above actual air temperature. This is not a sensor fault: it is a placement issue. Mount on a north-facing wall, under an eave or deck rail, at least 6 feet off the ground. If afternoon readings are consistently high but morning readings are accurate, the sensor is getting afternoon sun.
The S77925 searches for the WWVB atomic time signal at 7, 8, 9, 10, and 11 AM local time. It does not search continuously. If you set the station up in the afternoon, the clock may show the wrong time until the next morning's search window. Place the console near a window and leave it overnight: WWVB signal is strongest between midnight and 4 AM.
La Crosse recommends 3–4 weeks for the barometric pressure-based forecast to reach full accuracy. The forecast icons in the first two weeks are less reliable while the station builds a baseline of local pressure patterns. Temperature and humidity are accurate from day one, only the forecast icons benefit from the calibration period.
Sensor Placement: Where to Mount and Where to Avoid
Correct sensor placement: La Crosse official recommendation
- North-facing wall, shaded all day
- 6–18 inches under an eave
- Under a deck rail with open airflow
- At least 6 feet off the ground
- Vertically mounted to drain moisture
- Away from pavement, concrete, and metal
- Direct sunlight at any time of day
- Near a metal or dark-coloured roof
- Next to air conditioning units
- Near dryer or kitchen exhaust vents
- South or west-facing walls in afternoon sun
- Less than 5 feet from the ground
Source: La Crosse TX141TH-BV3 official product documentation and S77925v2 user manual, sensor placement section.
Video: S77925 Setup Walkthrough
This walkthrough shows the physical setup process: unboxing, sensor pairing, and the settings menu navigation in real time. Worth watching before mounting the sensor outdoors to see the pairing process and confirm your console is showing outdoor readings before you climb a ladder.
The video also demonstrates the auto-dim schedule setup and the barometric pressure graph: two features that are straightforward once you see the button sequence, but can be unintuitive from the manual alone.
Installing Add-On Sensors (TX145R Rain Sensor or Extra Temperature Sensors)
The S77925 supports optional add-on sensors: the TX145R rain sensor and up to 3 additional TX141TH-B or TX141TH-BCH temperature and humidity sensors. Important before you buy: per La Crosse's official specification, extra sensor data displays in place of barometric pressure: you cannot show both simultaneously on the S77925 display.
- Install batteries in the add-on sensor and power it up
- Hold the
+button on the console for 2 seconds: the reception indicator animates while searching - Wait up to 3 minutes for the add-on sensor to appear in the Extra Sensor area of the display
- Press the
EXTRAbutton to toggle between the pressure reading and the extra sensor data
Find compatible add-on sensors at lacrossetechnology.com/products/S77925#parts.
Pressure Calibration and Forecast Accuracy
The S77925's barometric pressure sensor is built into the console (not the outdoor sensor). La Crosse recommends allowing 3 to 4 weeks for the forecast icons to reach full accuracy. During this period the station is building a baseline of local pressure patterns: forecast icons in the first few weeks are less reliable than they will be after calibration.
Temperature and humidity readings are accurate from day one. Only the forecast icons benefit from the extended calibration window. If you are evaluating the station in the first two weeks and the forecast icons seem unreliable, allow more time before drawing conclusions.
The console displays pressure corrected to sea level automatically: you do not need to manually enter your elevation.
Setup Complete? Run Through This Checklist
- Outdoor temperature visible: displaying a real number, not dashes or NO
- Outdoor humidity visible: displaying a percentage, not dashes
- Correct time zone selected: check during settings menu step 4
- Sensor mounted vertically: allows moisture to drain from the bottom
- Sensor in full shade: no direct sun at any time of day, north-facing preferred
- Backup batteries installed: 3 AA alkaline in the console battery compartment
- Forecast icons active: may show generic icons for first 3–4 weeks during calibration
- Atomic clock sync: optional, may take up to 24 hours; clock icon appears when signal received
If Setup Does Not Work: Quick Fixes
If you hit a problem during setup, check the relevant symptom below. For a full troubleshooting walkthrough, see our La Crosse S77925 not connecting fix page.
Sensor not paired yet. Hold the + button for 2 seconds to manually search. If still no reading after 3 minutes: remove power from both units, press any console button 20 times, wait 2 minutes, reinstall fresh sensor batteries first, then restore console AC power. Allow up to 10 minutes.
WWVB signal not yet received. The station only searches at 7–11 AM. Leave the console near a window and wait until the next morning: the signal is strongest between midnight and 4 AM. Press and release SET to trigger a manual search attempt. If sync fails after 48 hours, set the time manually via the settings menu.
Range or wall attenuation issue. The TX141TH-BV3 has a 330-foot line-of-sight range but each wall reduces effective range by 30–50 feet. Move the sensor closer to the console, or rotate the console 90 degrees to improve antenna orientation. La Crosse's official support confirms rotating the display changes the antenna orientation and can significantly improve reception.
Borderline battery voltage or 433MHz interference. Replace sensor batteries with fresh high-quality alkaline cells. If the problem continues, check for nearby 433MHz devices: baby monitors, wireless doorbells, a neighbour's weather station. Move the console away from electronics and try a different room location.
Need to start over? Our La Crosse reset guide covers the S77925 sensor search, factory reset and history reset.
Frequently Asked Questions
How long does the La Crosse S77925 take to set up?
Sensor pairing takes 5–10 minutes. Settings configuration takes 3–5 minutes. Mounting the outdoor sensor in its final location adds 10–15 minutes. Most buyers have their first accurate outdoor reading within 20–30 minutes of opening the box.
Where should I place the outdoor sensor?
Per La Crosse's official documentation: mount the TX141TH-BV3 on a north-facing wall, at least 6 feet off the ground, 6 to 18 inches under an eave or deck rail. Mount vertically. Avoid direct sun, heat-absorbing surfaces (metal roofs, south-facing brick), and interference sources (AC units, dryer vents). Direct sun on the sensor housing is the single most common cause of inflated temperature readings.
How do I sync the atomic clock?
The S77925 automatically searches for the WWVB signal at 7, 8, 9, 10, and 11 AM local time. Press and release SET to manually trigger a search. For best reception, place the console near a window: the signal is strongest between midnight and 4 AM. If sync fails after 48 hours, set the time manually via the settings menu.
What batteries does the S77925 need?
The TX141TH-BV3 outdoor sensor uses 2 AA alkaline batteries (not included). The console runs on the included 5V AC adapter. Install 3 AA alkaline batteries in the console backup compartment to preserve settings during power outages. Do not use rechargeable NiMH batteries in the sensor.
Why is the outdoor reading showing dashes after setup?
Dashes mean the console has not yet received a signal from the TX141TH-BV3 sensor. Allow up to 10 minutes on first setup. If dashes persist: hold + for 2 seconds to manually search. If still no reading, remove batteries from both units, press any console button 20 times, wait 2 minutes, reinstall fresh alkaline batteries in the sensor first, then restore console power. See our full S77925 not connecting fix page for more detailed troubleshooting.
How long does the barometric pressure forecast take to calibrate?
La Crosse recommends 3 to 4 weeks for full forecast accuracy. Temperature and humidity are accurate from day one. The forecast icons become noticeably more reliable after the first month as the station builds a baseline of your local pressure patterns.
Can I add a rain gauge to the S77925?
Yes, the TX145R rain sensor is compatible. However, per La Crosse's official specification, extra sensor data displays in place of barometric pressure on the S77925 screen. You cannot show both simultaneously. Press EXTRA to toggle between pressure and rain data.
Full specs, pros and cons, comparison against the Ambient WS-2902C, and who the S77925 is right for, plus a dedicated not-connecting fix page if your sensor is having trouble.
Sources
All setup steps sourced from the official La Crosse S77925v2 manual on ManualsLib, the official La Crosse S77925v3 product page, and the TX141TH-BV3 official sensor documentation. Sensor placement specifications from La Crosse's published documentation. No manufacturer compensation was received.

Lena Thornton
Weather Tech Specialist & CWOP Contributor. Lena has researched and reviewed weather stations from La Crosse Technology, Ambient Weather, Ecowitt, Davis Instruments, AcuRite, and Tempest. She covers sensor technology, installation, and troubleshooting at The-Weather.com. Updated June 2026.
Ready to decide?
Get the La Crosse S77925 Setup
Prices and stock change daily. Check the current price, delivery options and what owners say in their reviews.
In this reviewLa Crosse S77925 SetupToday's price, delivery & owner reviews on Amazon
Check on Amazon →